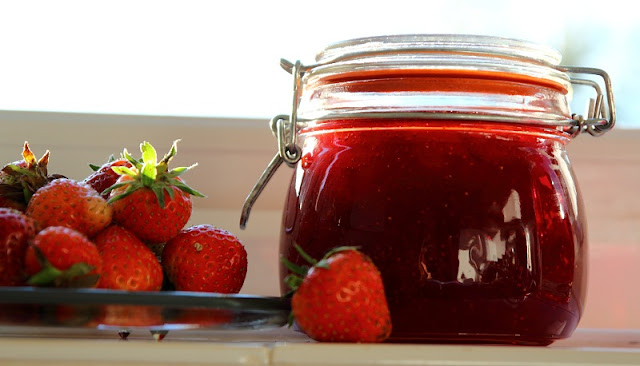
Pam's Strawberry Jam
Too much of a good thing is still TOO much. That's how I am beginning to feel about strawberries and cream. I couldn't get enough of them for the first week of the berry season, a couple of weeks on and I really don't want to eat strawberries and cream every day. Thank goodness it's easy to make Strawberry Jam!


I use Pam Corbin's recipe from River Cottage Handbook No. 2 - Preserves.
My strawberry bed is very tiny so I usually only have enough berries to make half a batch at a time. I don't have a preserve pan so I use the largest sauce pan I have, a stock pot would work well. I'll give you the recipe for a full batch which should make 4-5 jars of jam, 340gram jars.

You will need the following ingredients:
1 kg strawberries, hulled and quartered
500 g granulated sugar
450 g jam sugar with added pectin
150 ml lemon juice
Before you start to make your jam, you need to prepare the jam jars. I recycle and reuse old jam jars and lids. I collect interesting shaped jars of various sizes. Just make sure the jars and lids are in good condition and have an appropriate seal.
Begin by washing the jars and lids. When they are spotlessly clean, place the jars on a baking sheet and place in a very warm oven to sterilise. Leave them in the warm oven while you make the jam. Sterilise the jar lids in boiling water for 10 minutes immediately before using.

Now we can begin jamming!
Place 200g of the prepared strawberries into a preserving pan, add 200g granulated sugar and mash with a potato masher. Place over a gentle heat and when the mixture is warm, add the rest of the berries. Bring to a simmer and cook for about 5 minutes to let the berries soften.
Add the remaining granulated sugar and the jam sugar. Stir gently - when the sugar has dissolved, pour in the lemon juice.
Increase the heat and bring to a full rolling boil. Boil rapidly for 8-9 minutes then test for the setting point*. When the setting point has been reached, remove the pan from the heat and stir until the foamy, scum has disbursed. Let the jam set for a few minutes then pot into the sterilised jars and screw on the sterilised lids.
*The setting point can be determined in several ways:
Crinkle or saucer test- drop a little jam on to a cold saucer. (Pop a saucer into the fridge before starting to cook the jam) Allow the jam to cool for a minute then gently push with your finger. If the jam crinkles, setting point has been reached.
Flake test - Dip a clean wooden spoon into the jam, hold it up over the pan, twirl it around a couple of times, then let the jam drop from the side of the spoon. If the drops run together to form a flake, setting point has been reached.
Temperature test - Place a preserving thermometer into the jam when it has reached a full rolling boil. When the temperature reaches 104.5 degrees C, setting point has been reached.
If you can resist, leave the jam to set for a few days before eating. Your jam should be eaten within 12 months but I bet it won't last that long! For a real treat, make a proper cream tea with your homemade jam and freshly baked scones - delish!
Preserves is a fantastic book - everything I've made from it so far has been successful. I haven't made strawberry jam though as we only managed to get about 10 strawberries this year and about the same last year! Yours looks wonderful though - I just so love the colour.
ReplyDeleteThanks for your "gone Bodmin" comment on my blog, really made me laugh.
Thanks for the very kind comments. I love making jam. It brings out the pioneer woman in me, not sure that's a good thing, tho'. I am so pleased you visited my little blog. I love reading yours!
DeletePS: Glad you didn't mind the 'Bodmin' joke. I pushed the 'publish' button and then worried I might have been offensive. *Phew* I blame 'Doc Martin' for that one. : )